Staking ICNT from a Safe multisig wallet
In this tutorial, you will stake ICNT tokens from a Safe multisig wallet into the GLIF ICNT staking pool to start earning rewards with GLIF.
You will use the Safe Transaction Builder to create a batch transaction that performs two actions in a single on-chain operation:
- Approve the GLIF pool to spend your Safe's ICNT tokens
- Deposit your ICNT tokens from your Safe into the GLIF pool
Contents
In this tutorial, you will follow these steps:
- Step 1: Connect to a signer wallet and open the Transaction Builder
- Step 2: Create the First Transaction —
approve - Step 3: Create the Second Transaction —
deposit - Step 4: Review and Create Batch
- Step 5: Confirm Transaction
- Step 6: Sign
- Step 7: Get Additional Signatures
- Step 8: Execute the Transaction
Step 1: Connect to a signer wallet and open the Transaction Builder
- Connect a wallet that is a signer on your Safe multisig wallet.
- From your Safe multisig interface, click “New transaction”. Then click “Transaction Builder”.
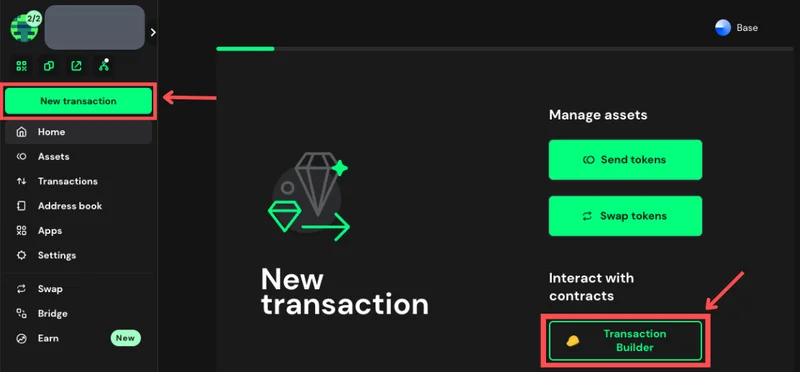
- Open the Transaction Builder App in Safe.
Step 2: Create the First Transaction — approve
This step gives the GLIF staking pool permission to spend your ICNT tokens.
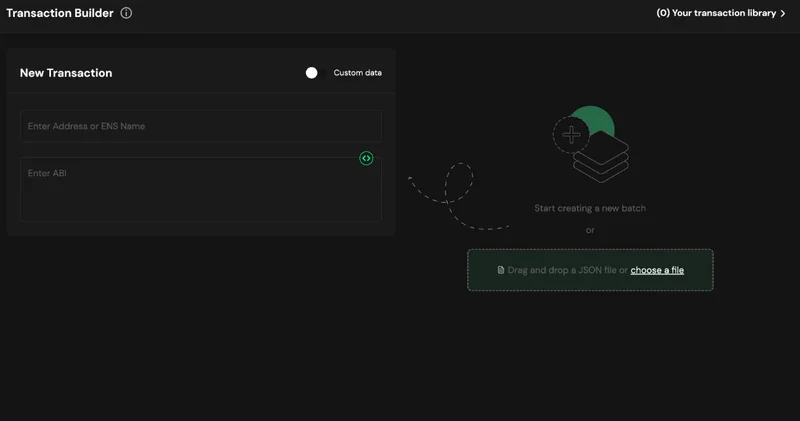
- In the “New Transaction” section, paste the following ICNT token contract address into the “Address or ENS Name” field:
NOTE
ICNT Token Contract (Base): 0xE0Cd4cAcDdcBF4f36e845407CE53E87717b6601d
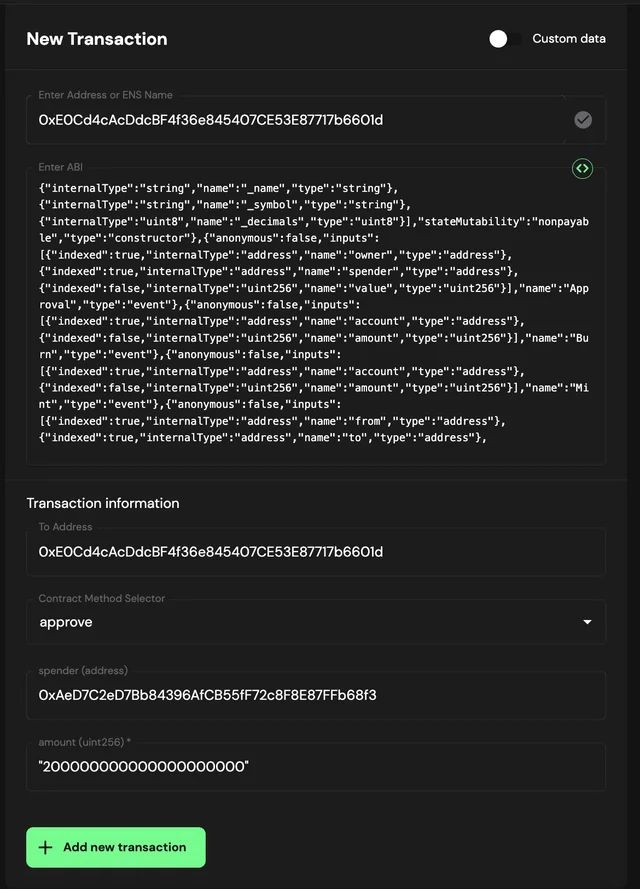
- The ABI should load automatically, and the Contract Method Selector will show
approve. - In the spender (address) field, enter the following ICNT staking pool address:
NOTE
ICNT Staking Pool Address: 0xAeD7C2eD7Bb84396AfCB55fF72c8F8E87FFb68f3
- In the amount (uint256) field, enter the number of ICNT tokens you want to stake in wei. You can convert your token amount to wei using this tool.
WARNING
Please always start with a small amount as a test transaction.
- Click “Add new transaction”.
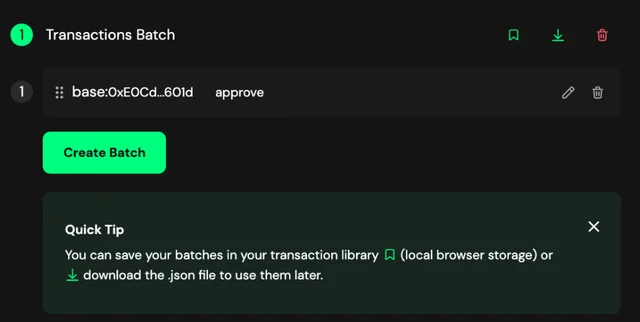
- You should now see a Transactions Batch summary with the
approveaction listed on the right.
Step 3: Create the Second Transaction — deposit
Next, you will create a transaction to deposit ICNT tokens into the GLIF staking pool.
- In a new transaction, enter the following staking pool contract address into the “Address or ENS Name” field:
NOTE
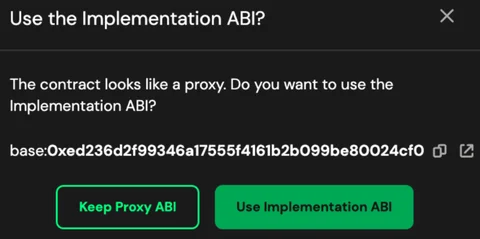
ICNT Staking Pool Address: 0xAeD7C2eD7Bb84396AfCB55fF72c8F8E87FFb68f3
- The ABI will load automatically. If prompted, choose “Use Implementation ABI”, since this is a proxy contract.
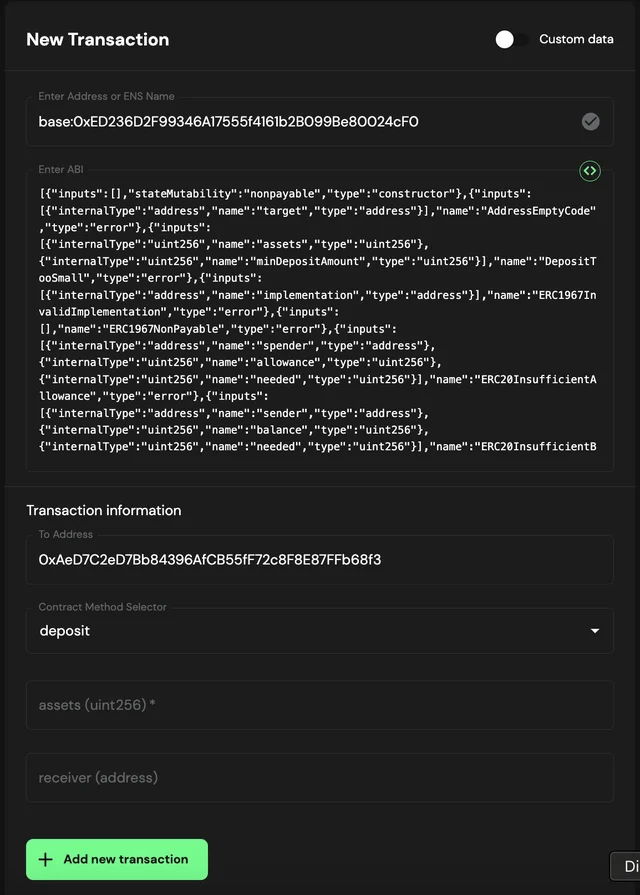
- From the Contract Method Selector, choose
deposit. - Enter the same ICNT amount (in wei) in the assets (uint256) field.
- In the receiver (address) field, enter your Safe wallet address, which will be the recipient of the stICNT.
- Click “Add new transaction”.
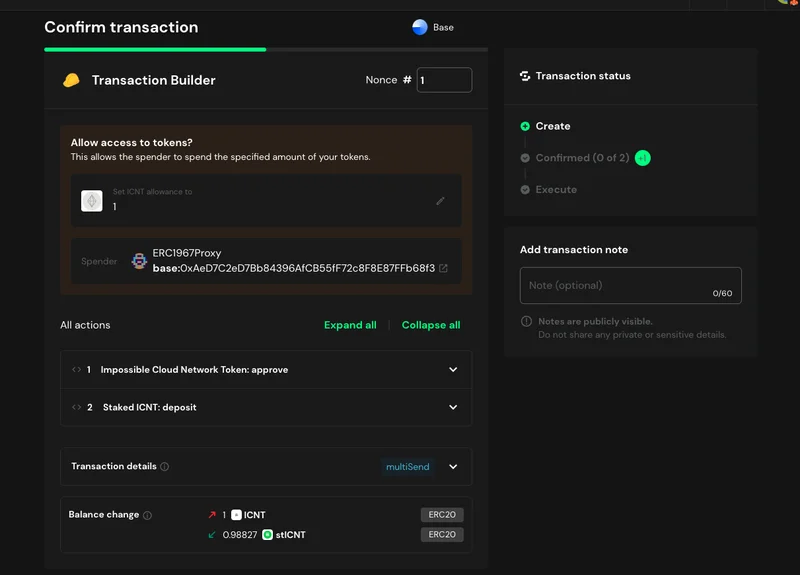
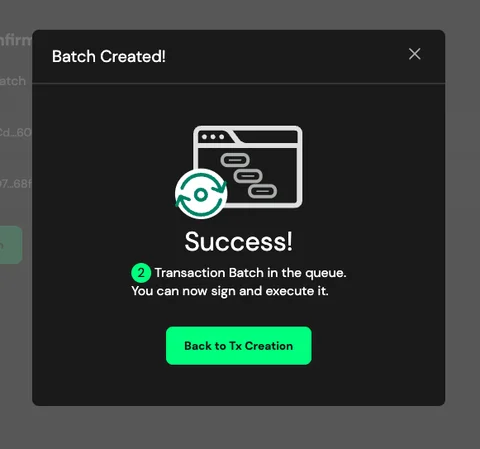
Step 4: Review and Create Batch
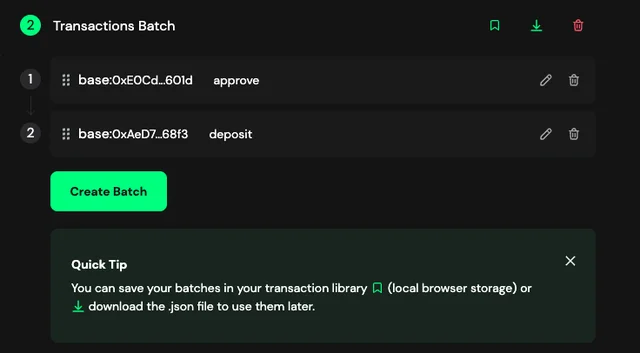
- You should now see both transactions ,
approveanddeposit, listed in your Transactions Batch summary. - Click “Create Batch”.
Step 5: Confirm transaction
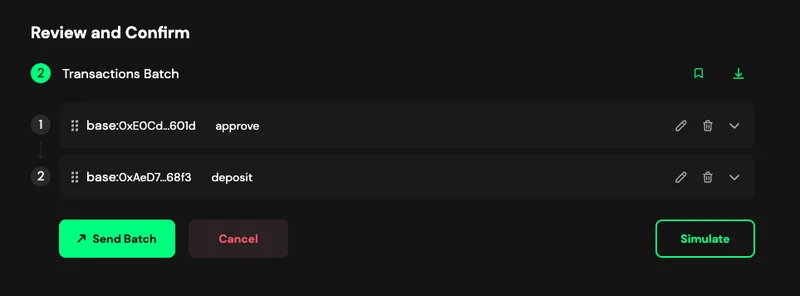
- On the Review and Confirm screen, click “Send Batch”.
- In the Balance Change section, confirm:
- A decrease in ICNT tokens (sent from the Safe wallet)
- An increase in staked ICNT (stICNT) (received in the Safe wallet)
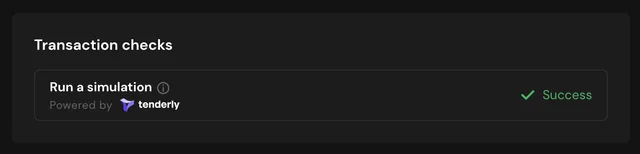
- You can click “Simulate” to check whether there are any issues with this transaction.
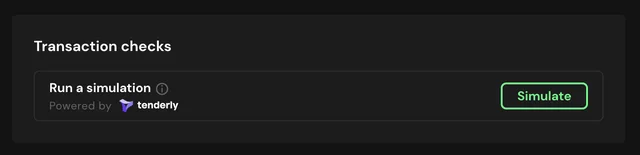
- You should see “Success” after simulating it.
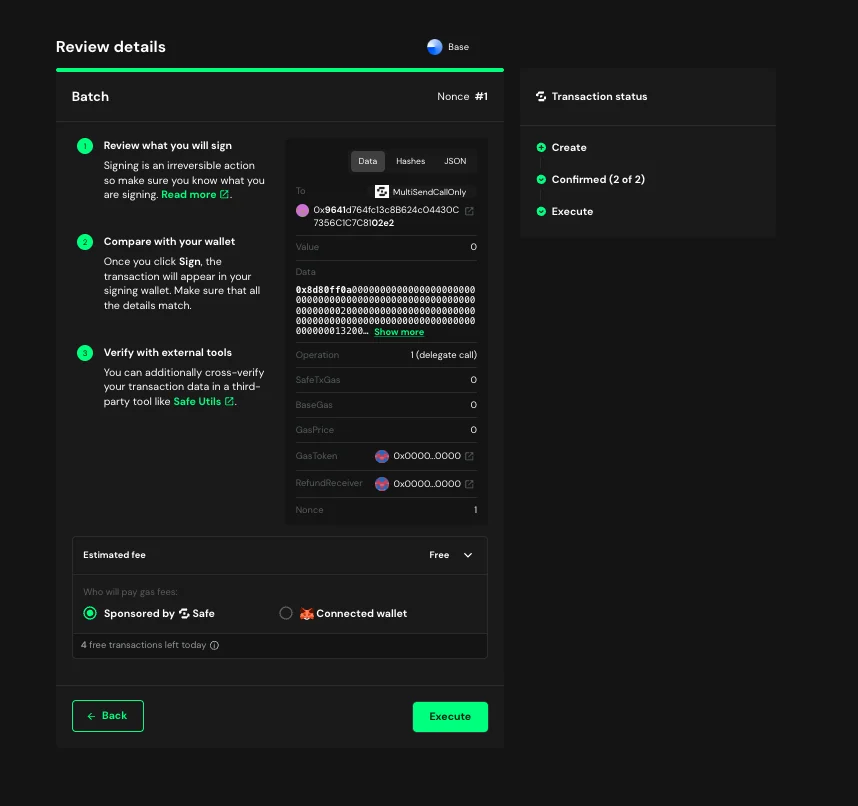
Step 6: Sign
- Click “Continue” to proceed to the Review Details screen.

- When ready, click “Sign” to approve the transaction from your Safe wallet.
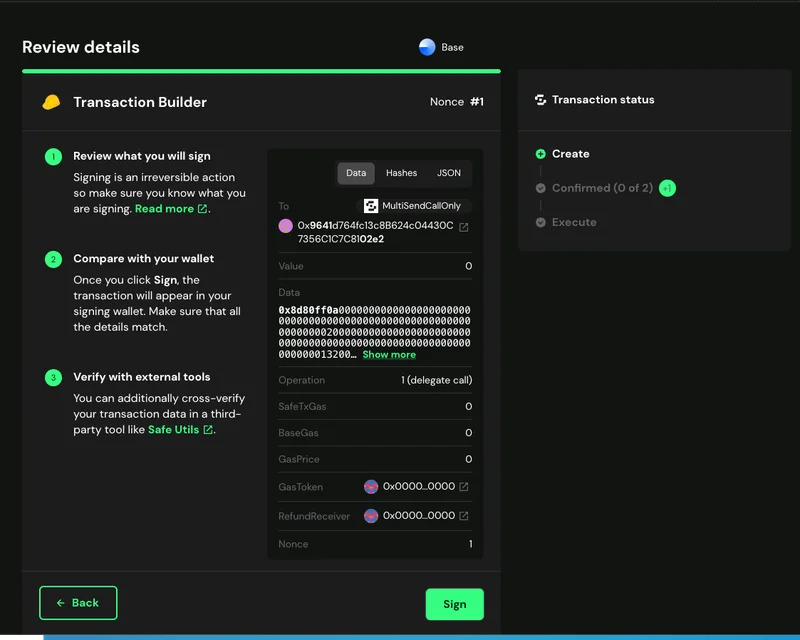
- Confirm the transaction in your wallet.
CAUTION
You should always match the transaction details you see on the screen with those you are signing in your wallet. Please make sure you understand what you are signing.
- The batch is now created, pending confirmation from other signers.
Step 7: Get Additional Signatures
- Connect with your other Safe signers.
- Go to the Transactions tab.
- Find the pending batch and click “Confirm”.

- Each signer must review and confirm the transaction, just like in Step 6 with the first signer.
Step 8: Execute the Transaction
- Once all required signers have approved, navigate to Transactions and click “Execute”.

- Confirm and review the transaction details.
WARNING
Please confirm that the wallet that executes your Safe proposal has enough gas fees on the Base chain.
- The transaction will now be processed on-chain.
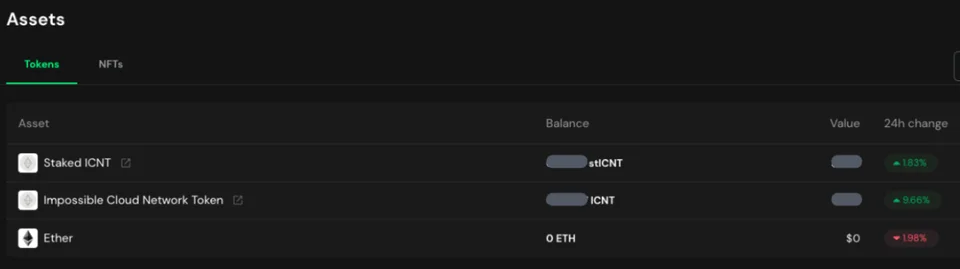
- After confirmation, check your updated balances in the Assets tab. You should see both ICNT and stICNT.
Conclusion
By following this step-by-step guide, you can successfully deposit your ICNT from a Safe multisig wallet into the GLIF staking pool and start earning rewards! Remember to always double-check addresses and transaction details to ensure the accuracy and security of your funds.
Join our community!
- 📢 Stay informed with updates on our blog and X (Twitter)
- 🤝 Connect with us through Discord and Telegram for support and partnerships
- 💬 If you encounter any difficulties, please open a Discord support ticket
- ⚠️ Beware of scammers! GLIF team members have the role “GLIF” or “Moderator”